Select Managers Screen from the Quick Menu on the left side of the screen, then select Configuration > Security Groups.
 OR
OR 
OR
Click the icon on the left for the Full menu.
 OR
OR 
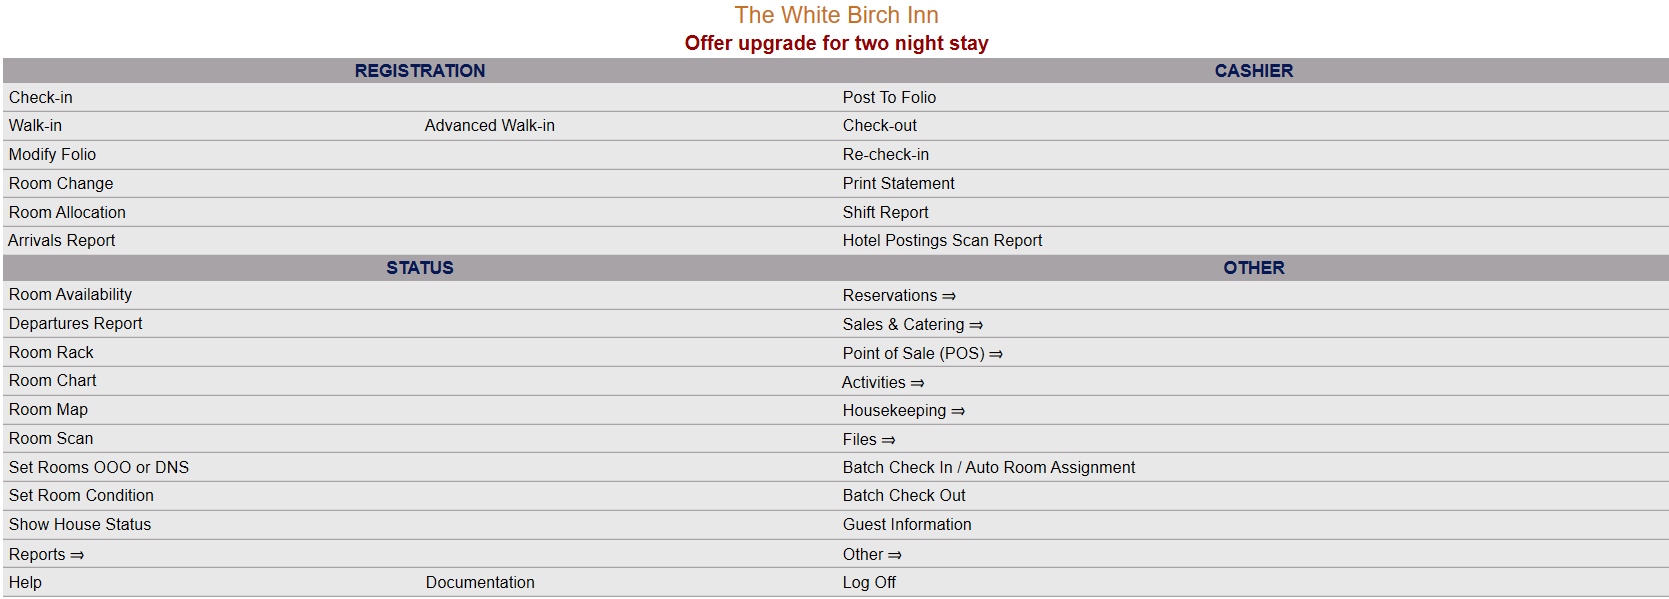
This will display the Full menu in a tabular form, with four sections, Registration, Status, Cashier and Other.
 OR
OR 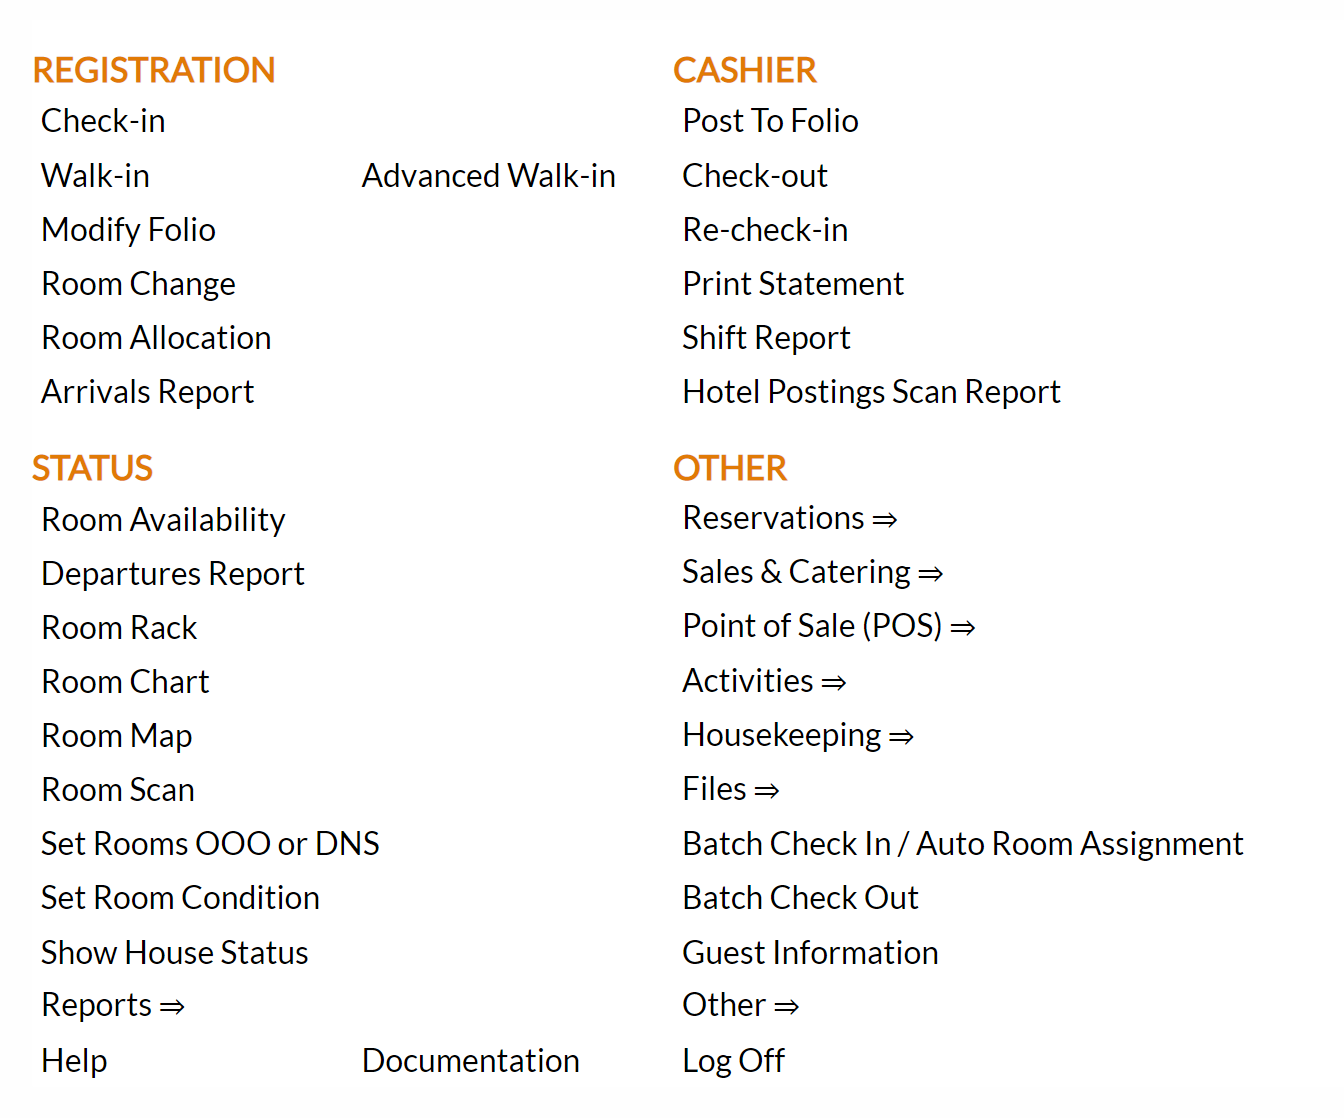
From the Other Section, select Other =>.
 OR
OR 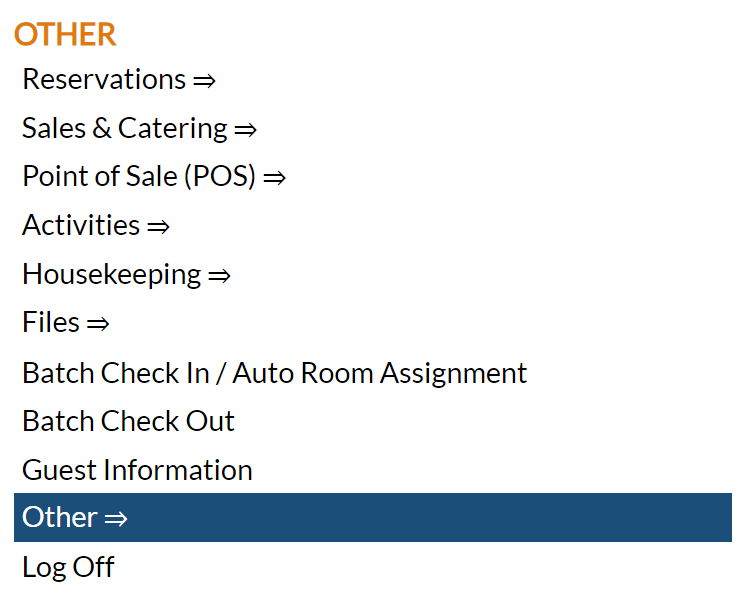
This will display the Other Front Desk Tasks Menu, divided into four sections: Other List 1, Other List 2, Documents and Web.
 OR
OR 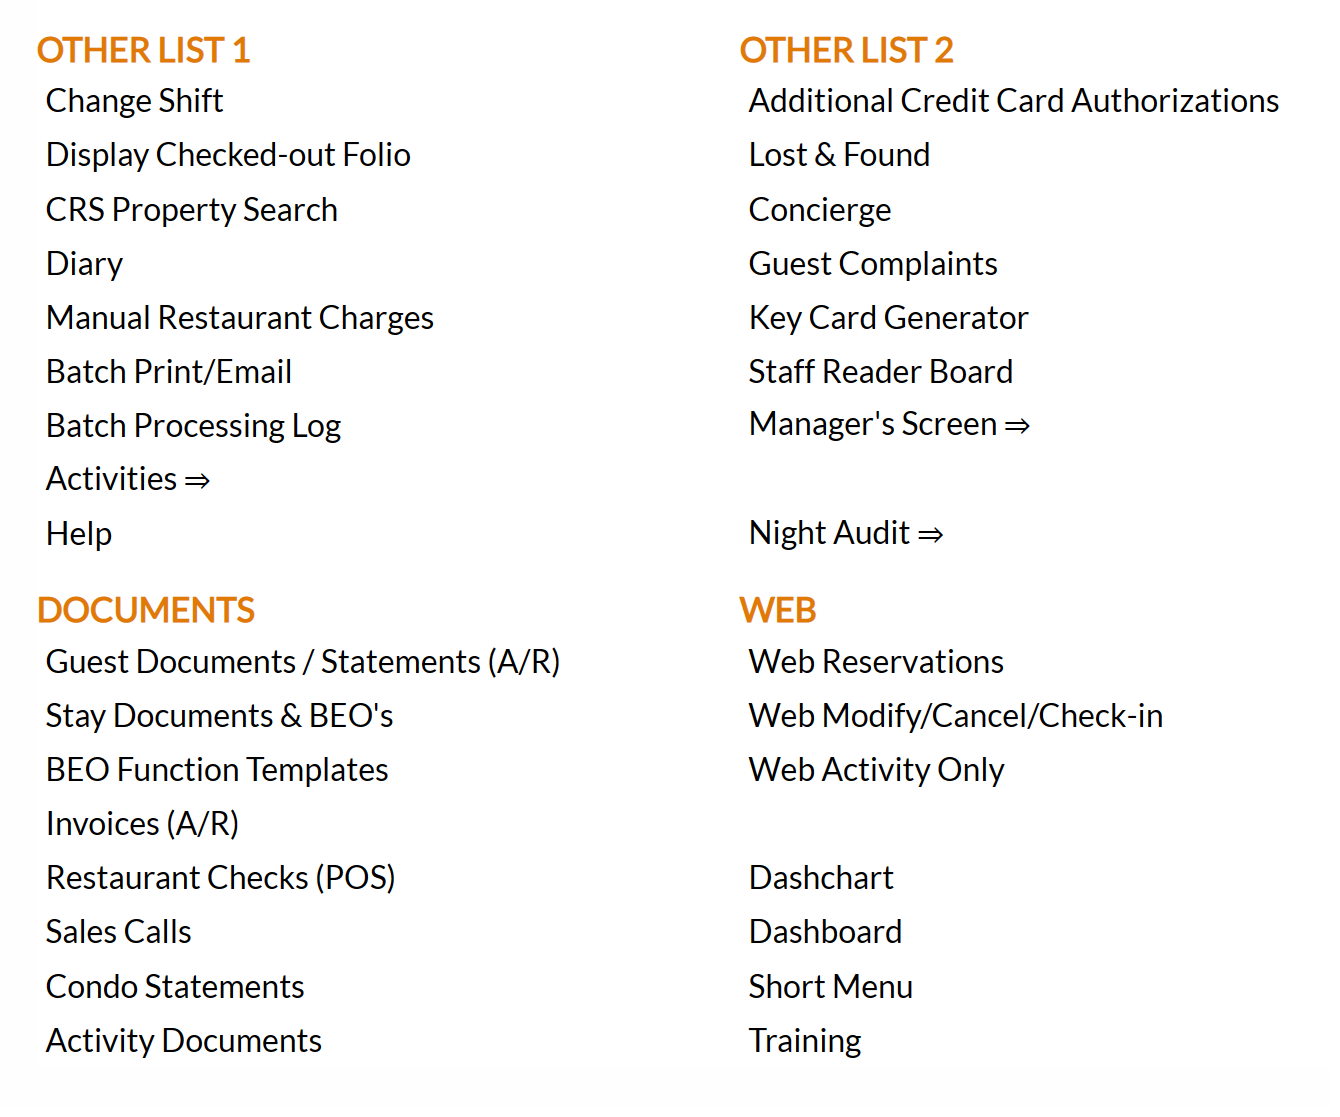
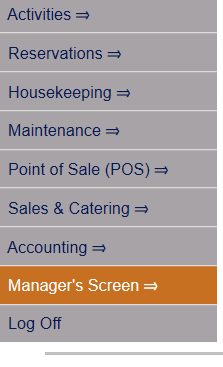
From the Other List 2 section, select Manager's Screen => to be taken to the Manager's Commands Menu screen.
 OR
OR 
From the Manager's Commands Menu, select Configuration to be taken to the Property and Configuration Menu screen.
 OR
OR 
Alternately, you may also be able to select Configuration directly from the Quick Menu, if the menu has been set up to include the Configuration option. This will also take you to The Property and System Configuration Menu.
 OR
OR 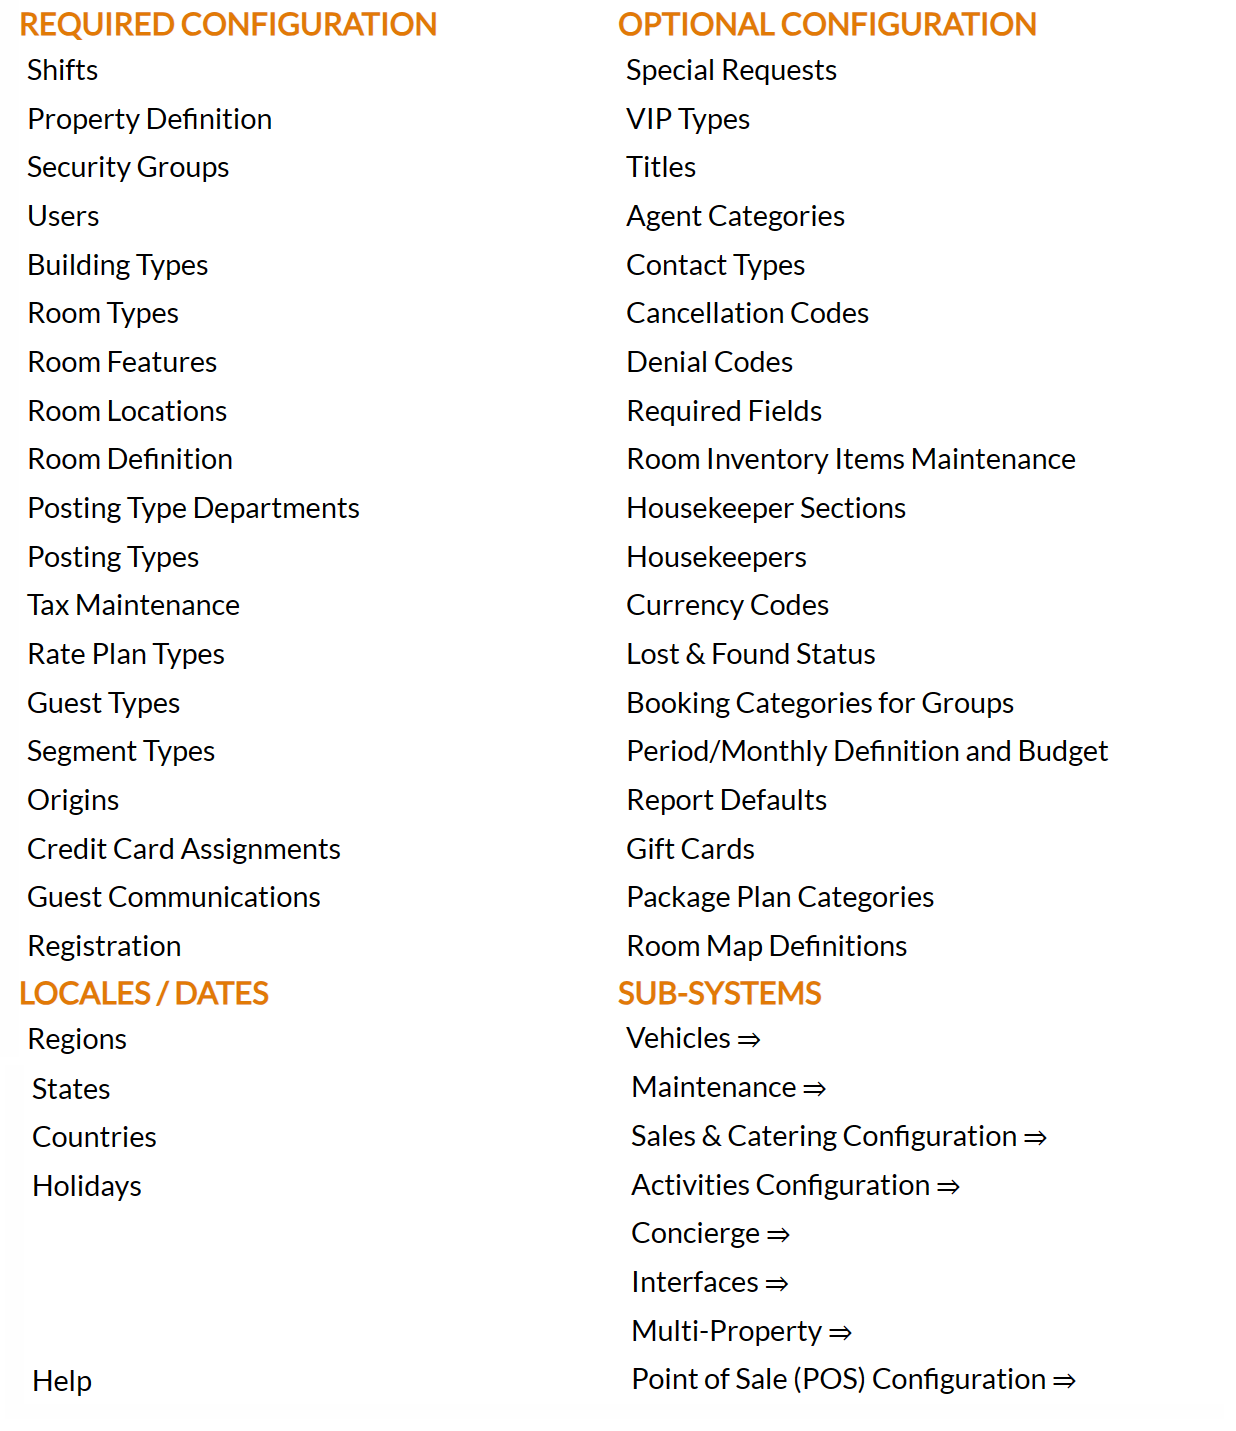
The list of property configuration options are divided into four sections, which are Required Configuration, Optional Configuration, Locales/Dates and Sub-Systems.
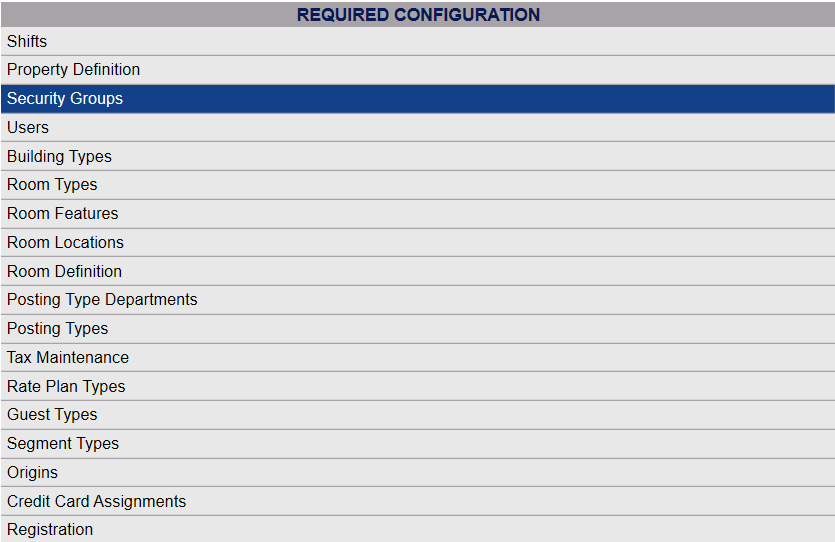
Select Security Groups from the Required Configuration section.
 OR
OR 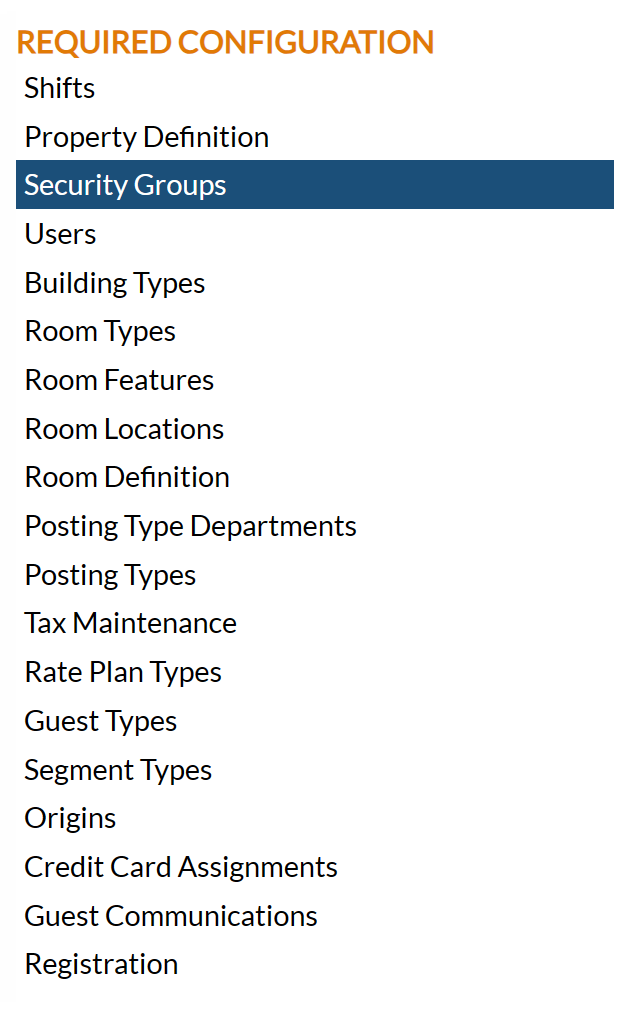
The Security Groups screen display is split into two frames, with the left side of the screen listing any already configured Security Groups for the property and the right side containing the fields you need to complete in order to add or edit a Security Group for the property. Any changes made on the right, once saved, will be updated in the listings to the left.
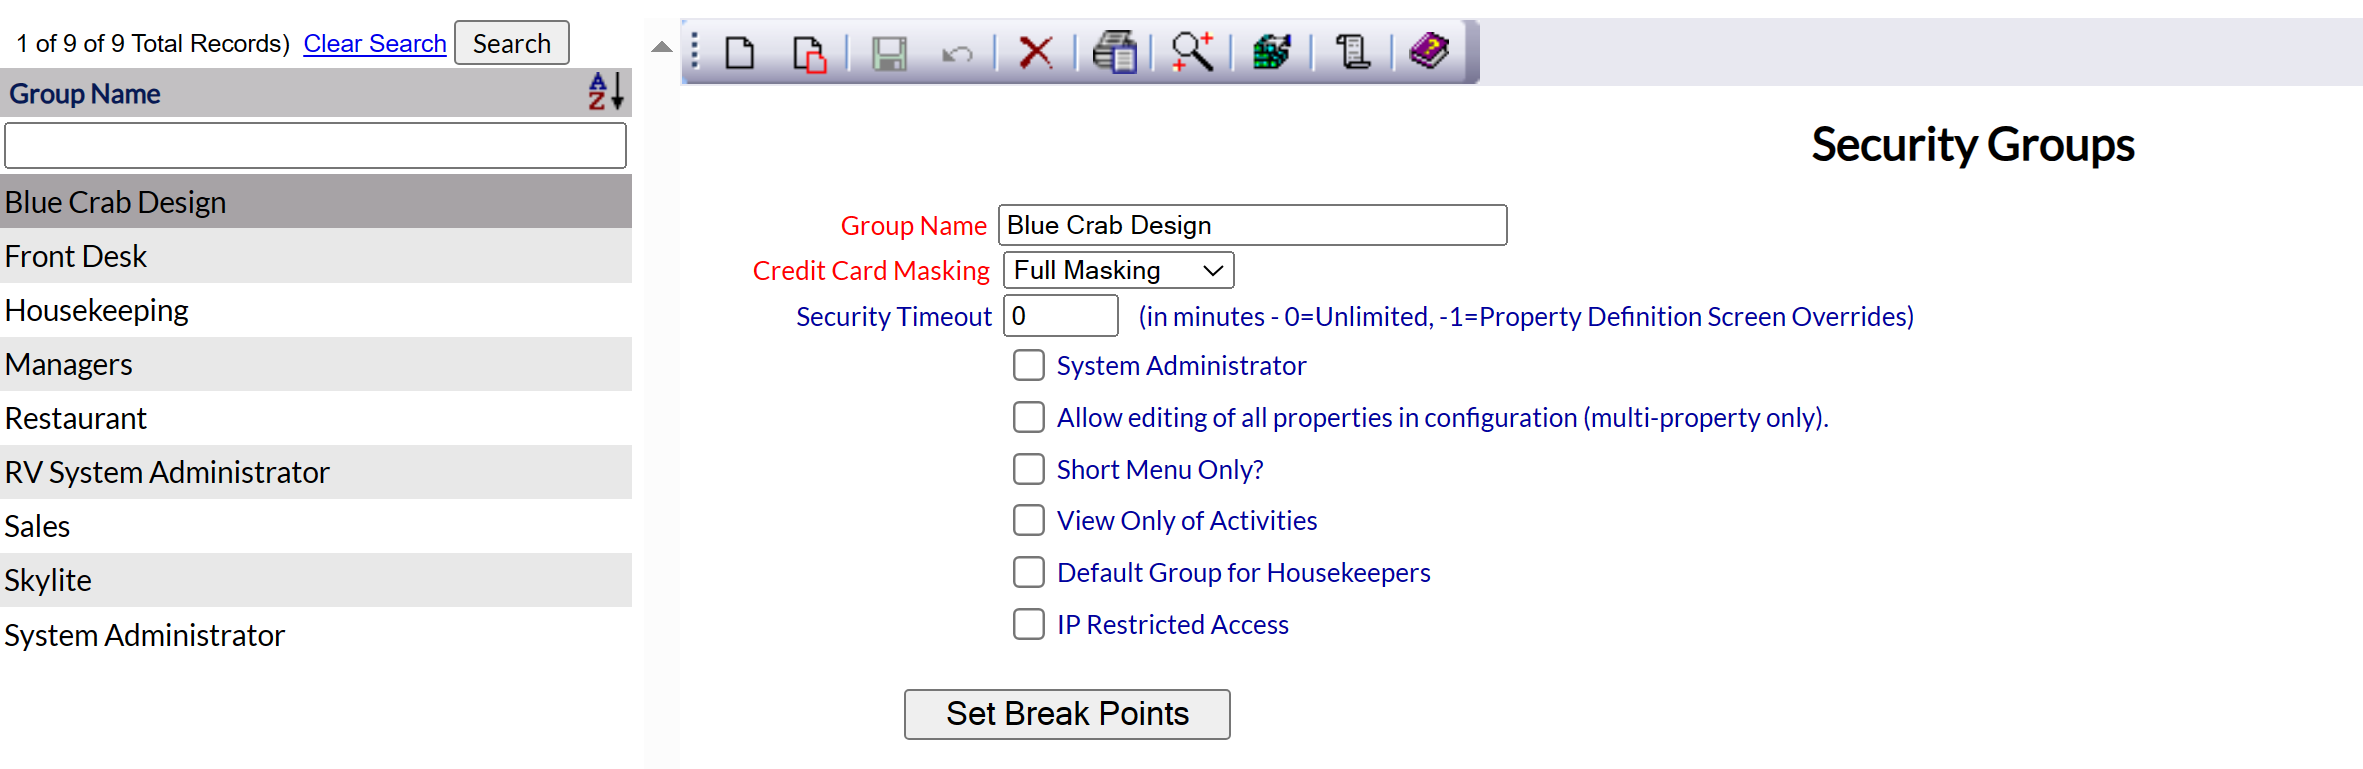
The currently configured options are displayed by:
Group Name: The assigned name of the Group. This is sorted alphabetically.
Selecting any Group Name will display the details on the right.
Your options include the following:
Generate a new entry:
Click the New  button from the toolbar to add a new Security Group.
Complete the fields described below.
OR:
Select an existing Security Group from the list on the left, and click the Replicate  button from the toolbar. Then change the field information as described below.
Edit the current selection:
Change the field information described below.
Group Name: This is the name of the Security Group. This is the group any individual User may be placed in. You should have a separate one for each “level” of access user groups require.
This field is required. You MUST name any Security Groups you generate.
Credit Card Masking: This only applies to properties NOT using a tokenizing credit card gateway; however a selection must be made if this option is available. This is a drop-down menu with three choices, Full, Partial or No Masking. Select the one which you wish to apply to the Security Group. By default Full Masking is selected for you.
This field is required.
Security Time-Out: This is the number of minutes when an inactive screen will time out. This is to enable you to prevent any unauthorized accessing of your Skyware Systems.
This field is optional. The default option is 0. -1 indicates that the Property Definition screen set up will be the default option used for this. 0 in this field means that you have chosen to have an unlimited amount of time for an inactive screen to continue displaying (i.e. no Security Time-Out).
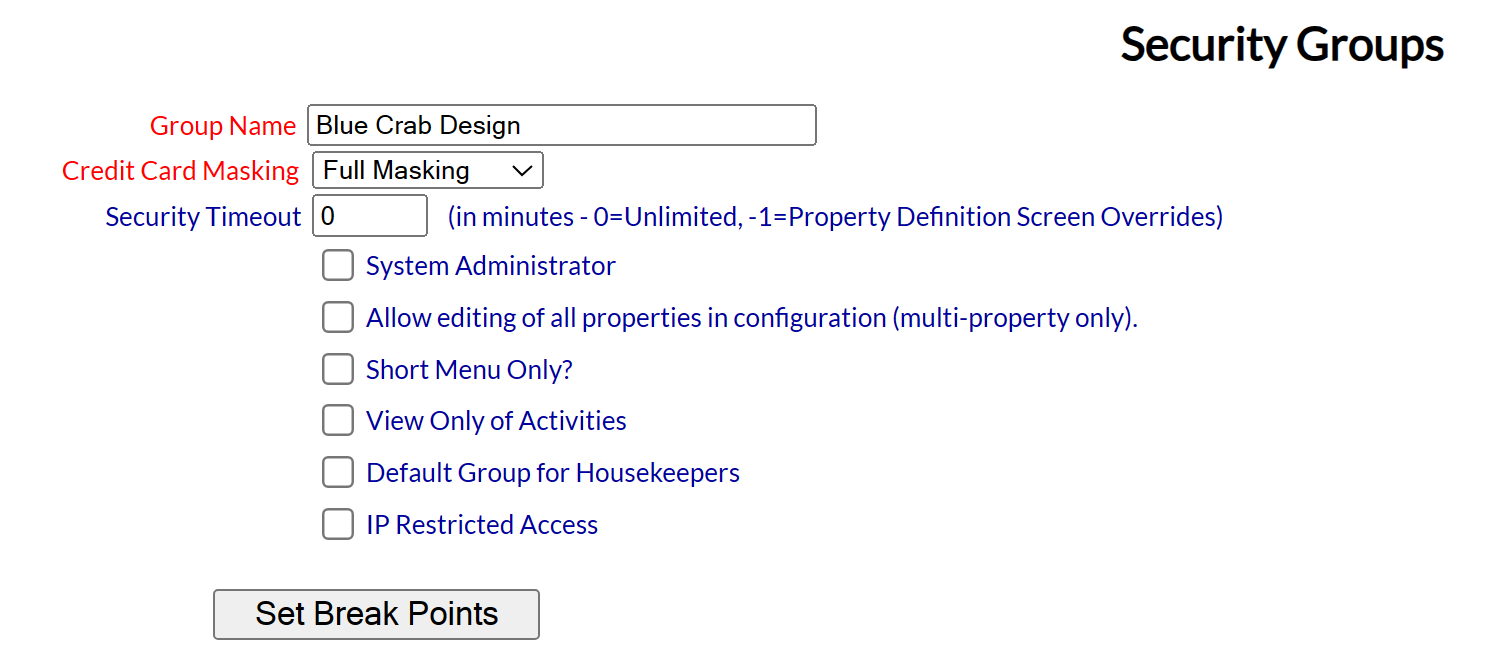
System Administrator: This box may be checked or unchecked. By default it is unchecked. System Administrator has access to ALL functions in the system, thus checking this box removes the "Set Break Points" from the screen, as no limits on access to program functions are expected/required.
Allow editing of all properties in configuration (multi-property only): This box may be checked or unchecked. By default it is unchecked. For our hotels with multiple properties, if checked this allows staff in a group to make changes to shared configuration items such as Rate Plans.
Short Menu Only?: This box may be checked or unchecked. By default it is unchecked. If checked, members of this security group will have access to the Short Menu only.
View Only of Activities: This box may be checked or unchecked. By default it is unchecked. If checked, then the Activities Schedule, Attendants' Schedule and Attendant's Appointments screens will be VIEW ONLY for members of this security group.
Default Group for Housekeepers: This box may be checked or unchecked. By default it is unchecked. If checked this group will be marked as the housekeeping group, and any new Users entered as Housekeepers should be added into this group. Only one group should have this option checked.
IP Restricted Access: This box may be checked or unchecked. By default it is unchecked. If checked, the Users in this group will be restricted to having Skyware access using the IP address set in the IP Address Maintenance screen ONLY. (Please call our support line at 877-759-9329 (SKY-WEB9), or email us at Support@SkywareSystems.com for further details).
When you are finished adding or editing Security Groups, click the Save  button to save the changes.
Set Break Points: (Once the Security Group has been created in Skyware), clicking this button will take you to a new screen where you can select the Break Points for the Security Group that you were editing.

This area allows you to determine which areas (menus, features, reports) that the security group will have access to, once a security group has been saved into Skyware. It also allows you to identify if some screens will be "View Only" for particular security groups, and to specify if several other functions are available (such as allowing the users in this security group to perform guest merges, or adjust stays labeled with a VIP type that enables lock out functionality).
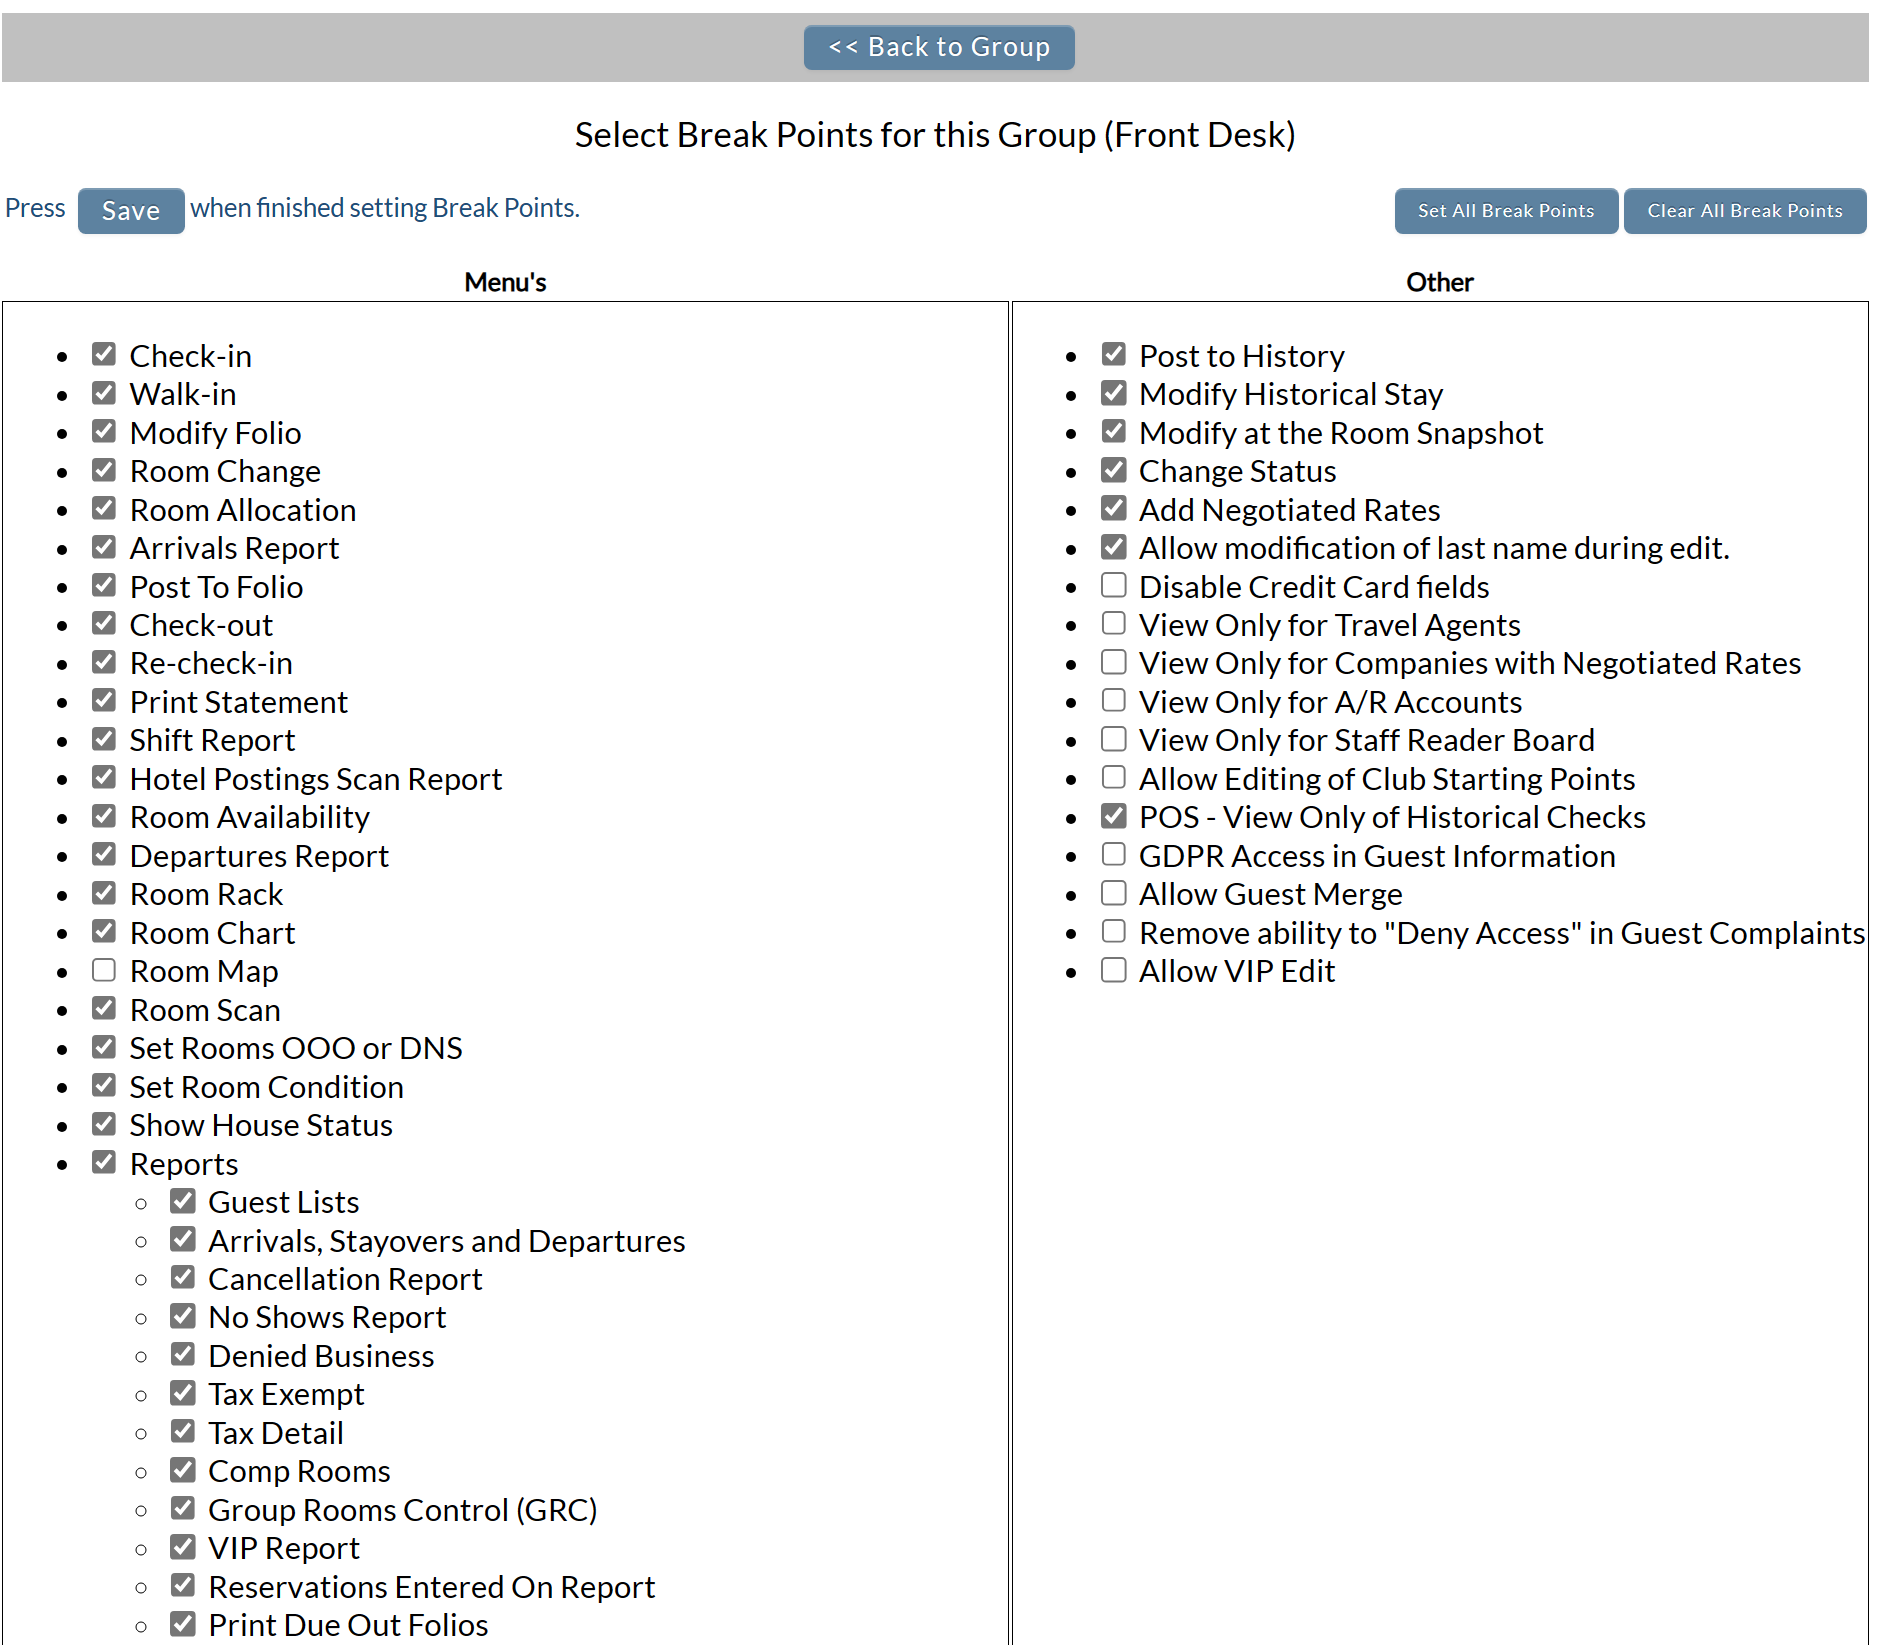
Check all the appropriate areas and click the Save button to save the changes.
NOTE: You can use the "Set All Break Points" button and then un-check the options that the selected Security group should not have access to if you wish the Group to have access to many/most functions; or conversely you can use the "Clear All Break Points" button to remove access to all functions until you check the appropriate one(s).
Be sure when you are finished adding or editing the security groups break points to click the Save button on this screen to save the changes. If you do not, the changes made here on the Break Points screen will not be saved for the Security Group.
To return to the Security Groups screen, click the "Back to Group" button at the top of the screen.